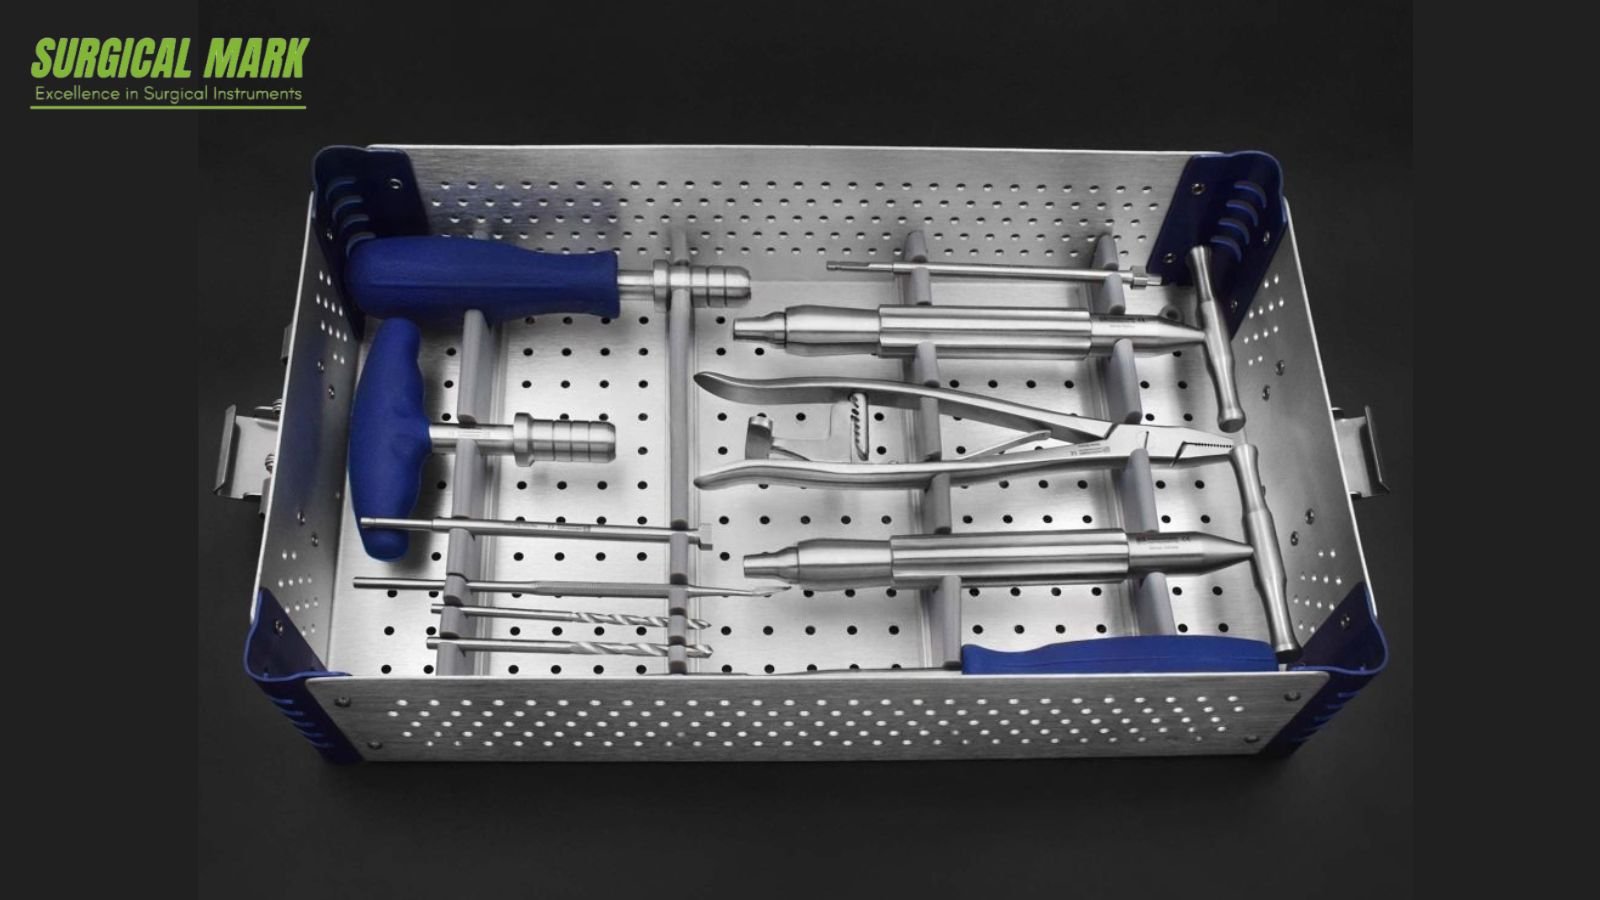
Maintaining the sterility of surgical instruments is critical to preventing infections and ensuring patient safety. Among orthopedic tools, a Broken Screw Removal Set is particularly important to handle carefully because it often comes into contact with bone fragments, metal shavings, and other biological materials. Proper sanitization not only prolongs the life of these specialized instruments but also ensures compliance with hospital hygiene standards.
Key reasons why proper sanitization is essential include:
- Prevention of infections: Eliminates bacteria, viruses, and other pathogens that could cause post-surgical complications.
- Preservation of instrument integrity: Prevents corrosion, rust, and mechanical wear, keeping extractors, taps, and drivers in optimal condition.
- Compliance with hospital protocols: Ensures adherence to strict hygiene and sterilization standards required in surgical environments.
- Safety for medical staff: Reduces the risk of contamination or injury during cleaning, handling, and surgery.
- Enhanced surgical outcomes: Clean and sterile instruments improve precision and efficiency during procedures.
- Longevity of the set: Regular and proper maintenance extends the life of this high-value orthopedic equipment.
Why Sanitizing a Broken Screw Removal Set Is Crucial
Broken screw removal tools, such as extractors, taps, and drivers, are used in complex orthopedic surgeries. They often encounter:
- Bone debris
- Blood and tissue residue
- Metal fragments from implants
If these instruments are not properly sanitized:
- There is a high risk of cross-contamination between patients.
- Instruments can corrode or degrade, reducing their effectiveness.
- Surgical outcomes may be compromised due to infection risks.
Step 1: Immediate Post-Use Care
- Wear protective gloves to prevent contamination.
- Rinse instruments immediately after surgery under lukewarm running water. Avoid using hot water as it may cause protein residues to coagulate, making cleaning harder.
- Remove visible debris using a soft brush, making sure to reach grooves and threaded areas of the extractors and taps.
Tip: Do not let debris dry on the instruments, as dried blood and bone fragments are harder to remove and can harbor pathogens.
Step 2: Pre-Cleaning Soak
- Prepare an enzymatic or neutral pH cleaning solution specifically designed for surgical instruments.
- Soak the instruments for 10–15 minutes.
- This helps loosen biological material, blood, and grease from implant surfaces.
Note: Avoid harsh detergents that can corrode stainless steel or titanium tools.
Step 3: Manual Cleaning
- Use a soft-bristled brush or pipe cleaners to clean the threads of screw extractors and taps thoroughly.
- Make sure to scrub all crevices and serrations, including inside hollow instruments if present.
- Rinse with distilled or deionized water to remove detergent residues.
Pro Tip: Ultrasonic cleaning can be used for small or intricately threaded tools to remove debris from hard-to-reach areas.
Step 4: Disinfection
- After cleaning, immerse the instruments in a high-level disinfectant according to manufacturer recommendations.
- Ensure complete coverage, allowing all surfaces to be in contact with the disinfectant.
- Follow the recommended exposure time usually 10–30 minutes depending on the solution used.
Step 5: Drying and Inspection
- Thoroughly dry all instruments with a sterile, lint-free cloth. Moisture can cause corrosion, especially on delicate extractors.
- Inspect each instrument for:
- Residual debris
- Corrosion or pitting
- Damage to threads or tips
Important: Damaged tools should be repaired or replaced, as compromised instruments can fail during surgery.
Step 6: Sterilization
Broken screw removal sets are usually sterilized using autoclaving, which is safe for most high-quality stainless steel and titanium instruments.
- Arrange instruments in a sterilization tray, ensuring they are not overcrowded.
- Use pouches or wraps to maintain sterility after the process.
- Sterilization cycle recommendation:
- Temperature: 121°C (250°F) – 132°C (270°F)
- Time: 15–30 minutes, depending on autoclave type
- Allow instruments to cool completely before handling or storage.
Alternative: For instruments that cannot withstand heat, low-temperature sterilization methods such as hydrogen peroxide gas plasma may be used.
Step 7: Proper Storage
- Store instruments in a dry, sterile environment.
- Keep instruments organized by type to avoid damage and ensure quick access.
- Use protective trays or foam inserts to prevent instruments from colliding during storage.
Additional Tips for Maintaining Your Broken Screw Removal Set
- Routine inspection: Check for wear and tear before each use.
- Avoid abrasive tools: Do not use steel wool or harsh abrasives on threaded instruments.
- Lubrication: Apply surgical-grade instrument lubricant if recommended by the manufacturer.
- Documentation: Maintain a sterilization log for each set to comply with hospital standards.
Conclusion
Sanitizing a broken screw removal set requires attention to detail, proper technique, and the use of appropriate cleaning and sterilization products. Following these steps ensures:
- Patient safety by preventing infections
- Instrument longevity by preventing corrosion and damage
- Operational efficiency in surgical settings
A well-maintained broken screw removal set is not only a professional necessity but also an investment in successful orthopedic outcomes.